Let’s start this review with a confession. I’ve been putting off writing this review of Adaptiverb by Zynaptiq because there is simply so much to say about it, both in terms of how it works and what you can do with it. Since, at the time of writing, it’s just come back on sale though, I have finally decided to have a good crack at it.
Here are the most important things you need to know about Adaptiverb if you don’t want to read the full review:
It’s more than just a reverb! I repeat, it’s more than just a reverb! Why do I make such a big thing of this? Because I won my copy two years ago in a competition run by Designing Sound and, while I was waiting to receive it, I checked out some YouTube demos. and was underwhelmed. It just sounded like another reverb and I already have loads of them. This was the fault of the YouTube demos though, not the plugin. Adaptiverb is a drone factory, it can perform rudimentary noise reduction in certain circumstances, it can produce vocoder-like sounds, it can cross-filter, it can make sounds brighter…and it’s also a reverb, good for mixing, mastering and sound design.
Secondly, when you are using it as a reverb, it’s not meant as a room emulator. Rather than mimicking real spaces, it’s designed to enhance the musicality of whatever it processes through reverb.
Thirdly, it has four different means of creating reverb – what they call a bionic resynthesis engine, which recreates the sustain portions of signals using a network of oscillators so that you get clean tales with no mud, a more traditional all-pass reverb model, which is dual mono, and two ray tracing models. These ray tracing models mimic the paths sound would take in a 3d simulation of a room from two sound sources to the listener position. In one model, the sound sources are pointed away from the listener and in the other the angle is different and the reflectivity is denser. These models have uniform decay and amplitude across all frequencies unlike the way sound would be reflected in the real world, which is why the reverbs do not model real spaces. These models are true stereo.
Fourthly and most importantly, Adaptiverb tracks the harmonics of the incoming audio and adjusts its output accordingly based on how the filter is set, either de-emphasizing the dominant harmonics or the n-harmonic content of the signal. This is where the ‘Adapti’ part comes in. What that means is that, if your piece of music changes key and you have the filter set to deemphasize the signal’s n-harmonic content, you won’t have a reverb tale containing the two clashing keys. As soon as Adaptiverb notices the new key, the clashing signal components will be suppressed, making everything sound cleaner. This means you can have infinite reverb tales that evolve and stay clean.
Here’s a couple of guitar fragments from our royalty-free music collection fed into an infinite reverb tale, first with no harmonic contour filtering, then with the n-harmonic content fully filtered to demonstrate.
It even works if the resynthesis engine and the reverb engine are bypassed. Here’s me blowing into a coke straw, first dry, then without n-harmonic content, and then without the harmonic content. So definitely more than just a reverb!
From this latter example, you can perhaps see where the basic noise reduction applications for the plugin might come in. If you have a narrow-band signal over hiss, depending on the exact nature of the signal and the noise, you could use the harmonic contour filter to reduce the hiss. Conversely, if you have a signal that is plagued by hum, you could de-emphasize the harmonic content of your audio and thereby reduce the hum. This is helped by the fact that it’s possible to capture a static profile for the harmonic contour filter.
What you would do is find a portion of your audio containing just the hum, play that through Adaptiverb and then, while it’s still playing, switch the track mode of the filter from its default, ‘Follow’, to ‘hold’, which means that the filter disregards the audio coming in in favour of the profile you have captured. Then, simply adjust the harmonic contour filter so that it de-emphasizes harmonic content to the appropriate degree and there you have it! What’s more, it’s possible to save these filter profiles as presets.
And that was just a Glance
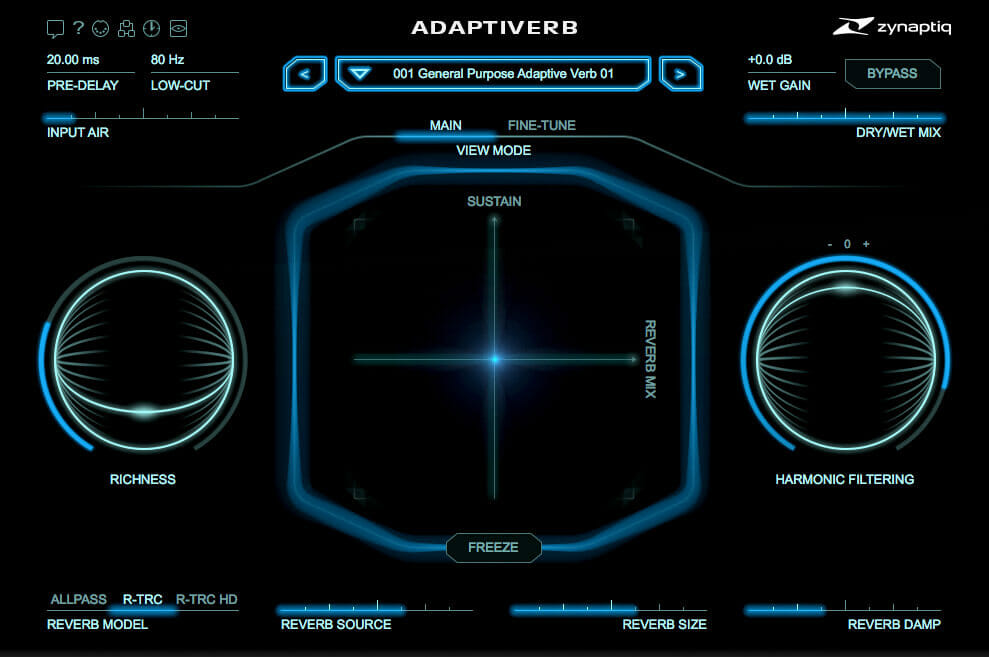
Now that we’ve got the overview out of the way, let’s dive in and look at the parameters in more depth. Although there are quite a few, like a lot of Zynaptiq plugins, there aren’t many when you consider how much the plugin can do. I like this stream-lined interface.
The first parameter we’ll consider is one of the simplest, the low-cut filter. No hidden surprises here, this simply removes the lows from the signal before processing. The filter’s maximum value is 1000 Hz. Even this can have a dramatic and unexpected effect on the result however.
I fed a badly recorded piece of guitar music through Adaptiverb. As we’ve seen, using this plugin, it’s possible to isolate or remove the predominating harmonic structure from the signal. Normally this would be equivalent to the notes the guitar plays, but if you crank the low-cut filter, you remove most of the fundamental frequencies of the audio before the harmonic contour filter gets to see them.
After throwing in some bionic resynthesis and lots of reverb, I got something decidedly unpleasant and other-worldly. I fed the result through a Wormhole, another Zynaptiq plugin I must get round to reviewing, but that was only really to enrich the result by including some pitch/frequency-reduced content to bring lows back. The plugin doing the lion’s share of the work producing this texture was Adaptiverb and the backbone of the lion in this case, what really gave the sound the character that appealed to me, was the humble low-cut filter.
A slightly modified version of this sound is available as part of our Accents and Atmospheres horror sound pack.
Before we get to the resynthesis engine, there’s the ‘Air’ parameter to consider. This synthesizes high frequencies in relation to the incoming audio to make signals brighter. The stated purpose of this parameter is to counter-act the fact that high frequencies decay more quickly than lower frequencies and so may be less prominent when resynthesis takes place.
All well and good, and the ‘Air’ parameter certainly serves this purpose admirably, but it can be used to brighten sounds without the resynthesis or reverb circuits being involved at all. I often use it like this and it works well.
It’s possible to over-use it quite easily when feeding the resynthesis engine, resulting in some shrill and harsh tones, but, used judiciously, it’s a really great tool.
When producing the sound effects for the ‘Accents and Atmospheres’ pack, I took a recording of some fireworks, screamers my mum used to call them, and pitched it down. When I cut it up, I found that I had some rather nice monstrous shrieks. Since they’d been pitched down though, they had, of course, lost a lot of their high end. I used the ‘Air’ parameter to brighten them. Here’s one.
There’s also a pre-delay parameter, which introduces a gap between the dry and the wet signals. This is common to many reverbs. Since most of the applications I use Adaptiverb for require the plugin to be set at 100% wet, I haven’t used it.
You can choose which source feeds the reverb and the HCF – the audio itself, the resynthesized version or a combination of the two, which can produce some lush sounds and some chorus-like effects. If you choose the resynthesized version, the rapidly changing parts of a signal, such as transients will be removed. Even without using the all-pass or ray tracing reverb engine, high values of the ‘sustain’ parameter sound pretty reverberant and produce long, harmonic tales.
Low levels of sustain work nicely too though. I recorded myself using what are called singing magnets, as this video explains, fed them through Adaptiverb’s resynthesis engine and got some rather nice, shrill sounds that reminded me of a display in a sci-fi setting. Here are a couple of examples.
The ‘Simplify’ parameter does what it says on the tin…and a lot more. What else would you expect from “the mad scientists at Zynaptiq”? In fact, perversely, it is arguably the most complicated parameter in the plugin, having two functions.
The first third of the slider quantizes each oscillator to its nearest semitone. The rest of the slider gradually reduces the number of oscillators resynthesizing the sound until you are just left with a pure tone that reflects the single-most important frequency in the audio at the time as decided by a fancy algorithm.
Using this parameter to strip your audio down can result in some waterphone-like effects and was the basis for a number of coldly magical sounds I produce for the ‘Accents and Atmospheres’ sound effects pack. This one, completely by chance, parodies a piece from the sound track of anime series ‘Hell Girl’.
Using the ‘Simplify’ parameter in conjunction with Adaptiverb’s freezers, (discussed below), it’s possible to create some powerful drones that don’t clutter the mix. Sometimes, when you don’t expect it, the perceptual algorithm that dictates what remains when you really crank the ‘Simplify’ slider throws you a curve ball and leaves something behind you might not notice. I made this energy field drone from a powerful amount of bass it locked onto.
When creating evolving drones or adding depth or sparkle to a sound, two of my favourite parameters are the ‘Richness’ and ‘Interval’ parameters. When increasing the ‘Richness’ slider, you re-balance the levels of existing partials to highlight the content
at a harmonic interval designated by, you’ve guessed it, the ‘Interval’ parameter. You can introduce detuned content or content that’s an octave up or down, a fifth up or a fourth down from the oscillators that are already working. This really does enrich things in a very transparent way.
One of my favourite techniques, when creating an ambient texture, is to randomly automate the ‘Richness’ parameter and feed the lot into the reverb section. This means that the soundscape changes in unpredictable ways, while keeping its overall character. Feeding the lot into the reverb section is important because the transitions between the intervals are discrete if smooth, so the reverb smears everything together nicely and keeps the transitions from sounding too sudden.
There is also a ‘Diffusion’ parameter, which in the words of the manual, “Adds diffusion to the sustain synth’s output by introducing interference between its inputs and outputs. This effect can be subtle.” It certainly can and, in the circumstances where I’ve worked with it, I haven’t really noticed a perceptible difference, but that isn’t to denigrate its usefulness at all.
The ‘Pitch Randomise’ parameter introduces random pitch fluctuations of the oscillators. This is useful for introducing chorus and detuning type effects. It’s also good for blurring high pitched tones into hisses that are less abrasive. Even at its most extreme setting, the randomisations remain confined within a small range, so nothing wild and crazy in that regard.
Before the resynthesis section come the freezers. A small segment of audio is saved to a buffer and then passed through the signal chain. The great thing about this is that it means you can listen to the resynthesized version, the actual version or a combination of the two, basically meaning that you have two frozen signals to play with. If you set the reverb source so that it doesn’t pull from the resynthesis engine and then turn the ‘Reverb Mix’ parameter all the way down, you’ll just hear the contents of the buffer.
All the resynthesis parameters just mentioned as well as all the HCF and reverb parameter can still be manipulated and will still make a difference to the audio. Only those in the input processing section, the low-cut, pre-delay and ‘Air’ parameters will have their states effectively frozen, i.e. whatever they imparted to the audio at the time the ‘Freeze’ switch was pressed stays imparted or removed as the case may be.
It gets even better. While the frozen audio is playing, you can set things such that the harmonic contour filter is still updating, reading the input audio as it plays unheard. It will then filter the frozen audio according to the changing harmonic profile and how you have the de-emphasis of the filter set. This means that the drone will be far more organic than with other freezers…or not if you prefer.
In the HCF section, there is a switch that allows you to toggle between ‘Hold’, (whatever harmonic profile has been captured when hold is initiated will be retained and will not update’, ‘Follow’, (the harmonic contour filter will continue to update its profile, irrespective of whether ‘Freeze’ is on or off) and ‘Linked’, (Whenever ‘Freeze’ is activated, so to is hold, meaning that the filter profile and audio buffer are synchronized to produce a truly static drone.)
All this means that any dynamic source of audio, anything at all, from the worst recording ever to the highest fidelity classical performance, can be mined for a practically infinite array of drones and evolving textures. And the very best part? What really sets this plugin apart from me is that the audio buffer and filter profile saves with your presets. No fuss, no muss. It is very easy to share drones with fellow Adaptiverb users, to save drones to come back to, even if you’re not sure they’re perfect, rather than lose them and to recall them at any time.
This means that you can apply the harmonics of a guitar chord to speech, for example, hence the ability to produce vocoder-like sounds. Simply hit hold on the right place in your guitar chord, the profile is saved, save the preset, load whatever audio you like in the future and make it sound sort of like a guitar.
Ah yes. Almost forgot, there’s a reverb section that all this feeds into. You might feel on slightly firmer ground here, as the parameters have a more traditional feel. There are controls to regulate reverb size and damping and also to change the reverb model as discussed above. The best way to decide what reverb models you like best is to try them for yourself.
One important thing to note here is that, because of the nature of the algorithms that drive the reverb models, you can’t automate the reverb size parameter smoothly. Every time you change its value, everything must be recalculated. Essentially, the virtual room must be rebuilt. These transitions are dealt with far more delicately than with pops and clicks however. The audio simply cross-fades.
There’s also a ‘Reverb Mix’ parameter, which either blends the reverberant signal with the output from the resynthesis section or the output from the input processing section, depending on how you have your ‘Reverb Source’ slider set. This was the part of the plugin that had the steepest learning curve for me, but I got my head round it in the end!
Most of the parameters and applications of this section have already been discussed, but there are a few other things worth noting.
The first is an HCF Weighting’ parameter, which applies a spectral bias to the harmonic profile the filter captures. In my example of the coke straw above, I found the best results were produced when I set this parameter all the way to maximum.
The ‘Breathyness’ parameter allows you to add noise back into a signal whose n-harmonic content has been attenuated. This isn’t artificially created noise, but rather the residue from the filter, that is to say noise that is already inherent in the signal. This can give more natural-sounding results.
The ‘Tracking Mode’ parameter allows you to toggle between turning the filter off altogether, having the filter track the input as mentioned earlier or having it capture its profile from a built-in, on-screen keyboard that comes with the plugin. This means that you can filter your audio according to chords or notes you play. There are a list of five snapshots that enable you to recall five chords quickly and also a ‘Quantization’ toggle, which controls the steepness of the filter in this mode.
Unfortunately, without regurgitating the manual, I am unable to offer much insight into this area of the plugin’s operation because the keyboard is currently inaccessible to visually impaired users. Zynaptiq has said that it is their intention to add support for midi input at some point in the future and I certainly hope they are able to do this soon. I am sure the feature is an excellent addition for those who can use it though, given the quality of everything else the plugin has to offer.
Automating the ‘HCF Amount’ parameter, the bipolar control that adjusts the filter’s de-emphasis, can produce dramatic results. Even small movements of the parameter can have a large effect and using this control is another great way of producing evolving textures.
I produced this eerie drone using some frozen audio and simply randomised automation of the ‘HCF Amount’ parameter within a small range to produce a great little movement up and down a minor scale.
A cool feature that would make the plugin even better would be if the harmonic contour filter could read from a side-chain input or if the profile from one channel could be applied to the profile of the other. In this way, you should be able to produce some strange sounds according to the degree of similarity between too different audio sources.You could filter something with your voice for example or vice versa.
The whole point in Adaptiverb, as you will have gathered by now, is to separate harmonic and n-harmonic content. This means that the plugin can be very sensitive to background hum.
I was working on one piece of audio that had some air conditioning hum in it. Before processing it with Adaptiverb, I sought to remove this with a high-pass filter. Although I managed to make it pretty much inaudible when the unaffected audio played, when I put Adaptiverb on it, there was the air conditioner, clear as a bell, as if the eq had never been there. I had to stack high-pass filters to get rid of it to Adaptiverb’s satisfaction. Of course, I could also have used the built-in low-cut filter.
This is not a deficiency in the plugin, merely something it’s worth bearing in mind when using it. Passing cars, neighbours thumping around, machinery noise etc that you might not really notice before Adaptiverb is applied, might stand out. Of course, what this means is, as with so many plugins, it’s worth ensuring that your source audio is as clean as possible if you want predictable results. On the other hand, these anomalies can sometimes produce interesting sonic characteristics, depending on what you’re going for.
If you need any drones or textures you’re creating to be mono-compatible, it’s worth always checking for phase issues before you render your work. I have often found that mono-compatibility is better when I rotate the phase of one of the channels when I’m ready to render. With bassier material, I also often use a stereo image filter to centre the lower frequencies.
Sometimes, in certain circumstances and at certain settings, artifacts or characteristic sounds can appear. When having the ‘HCF Weighting’ control at its minimum setting for example, a characteristic resonance sometimes manifests. Similarly, operating with the harmonic content fully de-emphasized can sometimes produce a certain kind of churning fuzz.
Occasionally, when freezing certain audio, a regular, echoing, dragging clack can be heard or a rapid fluttering, depending on the precise settings you have entered. This doesn’t happen very often, but it’s worth watching out for.
Again, these are not deficiencies in the plugin. If you push most DSP processes too hard, artifacts will appear. They’re just things it’s worth being aware of. In some ways, it’s almost a relief that Adaptiverb can produce these artifacts, otherwise there would be no work for a sound designer to do when using it.
The plugin is very accessible to visually impaired users for the most part. All the plugin parameters use “friendly formatted values”, which makes adding automation and manipulating the parameters much easier.
Areas that are not accessible as yet are the keyboard area of the HCF, as previously mentioned, and the low-latency mode.
Adaptiverb can be very CPU hungry, particularly at high sample rates, what with everything it is trying to do, so if sighted users click on the big clock in the GUI, the plugin will run in low-latency mode. Unfortunately, given that this is not an automatable parameter, visually impaired users cannot access this. A work-around I employ if things really start to grind is to set my project to a lower sample rate for preview purposes and then reset before rendering my work. Another good tip is to use the buffer size the manual recommends, (1024).
Also inaccessible is the ability to lock the dry/wet control so that it remains static as you change presets, which is a new feature introduced in the latest version.
Unfortunately, the latest version of the plugin has introduced an accessibility regression. It appears that Zynaptiq has updated their preset manager so that, whereas before, they were one of the very few manufacturers whose plugin presets were accessible to the visually impaired, now this no longer seems to be the case. This is particularly sad as far as Adaptiverb is concerned as the presets are numerous and very good, really allowing the user to get to grips with what the plugin can do and offering an excellent library of drones and filter profiles. Hopefully this can be fixed in future versions.
I would be very hard-pressed to pick a favourite plugin of all those I own, but, if I really had to, Adaptiverb would be it. Acquiring Adaptiverb was a pivotal moment in my sound design career as it accelerated my workflow tremendously. The sheer scope of what it can do and the ease with which it can be done more than adequately justifies the price and it has such an original and exciting sound.
If I am blocked and tired, but really want to get something created, I’ll sit down with Adaptiverb and bash out some drones. It really is that easy. It gives you lush reverb with a fraction of the need to worry about mud that other reverbs have. If there is one plugin missing from your arsenal and you don’t have Adaptiverb, this is it.
Adaptiverb can be purchased from https://www.zynaptiq.com If you’re reading this article just after its release, grab Adaptiverb while it’s on sale.
Many more sounds that were created using Adaptiverb can be found here and here.
Add to list
Please select the list to add to.
List Details